Siri shortcuts, a new feature presented at last year’s WWDC, offer the ability to perform certain functionalities of the application in the background. We do not have to turn on the application to use these functionalities in the application, we can simply say to Siri, e.g. “Burger Time” and the system knows to which application this shortcut is assigned and orders a burger for us. 😀
What are Siri Shortcuts? 📝
- A convenient way to accomplish tasks from the lock screen or search area.
- Shortcuts can also be added to Siri to run with a voice phrase on iOS, HomePod and watchOS.
- Developers add shortcut hooks into their apps that enable Siri to connect to these shortcuts.
- Using machine learning models of your behavior to analyze common functions that you perform and suggest shortcuts automatically.
- iOS 12+
In this article, we will focus on implementing the order shortcut on one of the most popular voice assistant. We will create a simple application that will allow you to order burgers 🍔
How can we create Siri shortcuts? 🤔

- At the very beginning, we have to think about the functionality which the user really wants to make easier in our application. This should be a functionality that the user performs frequently and requires the user to enter the application and pass a long path in it. Shortcuts will enable shortening this path to perform the functionality.
- In the next step, you need to donate a shortcut. What does this mean? We must pass the information to the system about the fact that we have placed an order, for example one burger with bacon. We provide this information to the system and later Siri can suggest us at a specific time to make this specific order.
- The last thing to do is to handle this shortcut, which happens when the user tells Siri the command defined earlier, e.g. “Burger time”, or in the case when the user presses the shortcut suggested by Siri on the lock screen.
Ok, maybe we’ll write some code? What are our possibilities as developers? 👨💻
NSUserActivity — We will create a shortcut that will let us launch the screen for making a new order
- Add the key to Info.plist
<key>NSUserActivityTypes</key>
<array>
	<string>com.miquido.SiriShotcutDemo.make-order</string>
</array>
2. Donate the shortcut when the user enters the screen
let orderActivity = NSUserActivity(activityType: "com.miquido.SiriShotcutDemo.make-order")
orderActivity.persistentIdentifier = NSUserActivityPersistentIdentifier("com.miquido.SiriShotcutDemo.make-order")
orderActivity.isEligibleForSearch = true
orderActivity.isEligibleForPrediction = true
orderActivity.title = "Make an order"
orderActivity.suggestedInvocationPhrase = "Burger time"

let attributes = CSSearchableItemAttributeSet(itemContentType: kUTTypeItem as String)
attributes.contentDescription = "Delicious burgers 🍔!"
attributes.thumbnailData = UIImage(named: "logo")?.pngData()
orderActivity.contentAttributeSet = attributes
userActivity = orderActivity
3. In the AppDelegate, you must implement continueUserActivity delegate which, after getting this particular type, will redirect to the given screen
func application(_ application: UIApplication,
                 continue userActivity: NSUserActivity,
                 restorationHandler: @escaping ([UIUserActivityRestoring]?) -> Void) -> Bool {
    if userActivity.activityType == "com.miquido.SiriShotcutDemo.make-order" {
        // handle open app on order screen
        return true
    }
    return false
}
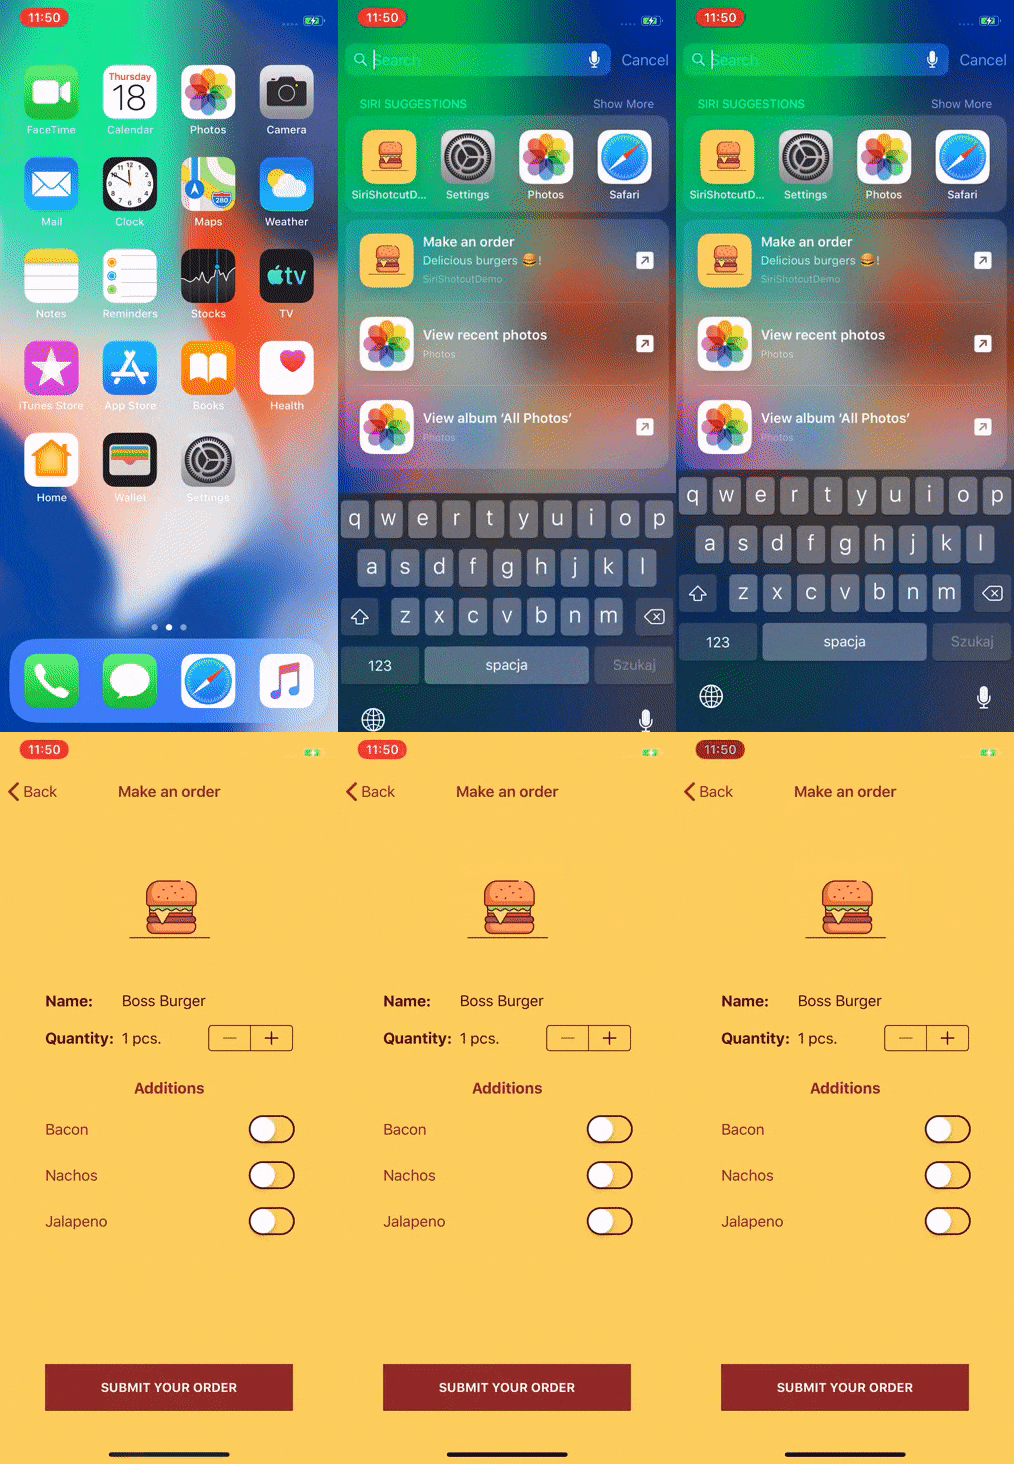
Intents — We will implement a shortcut to make orders
Pro tip before implementation:
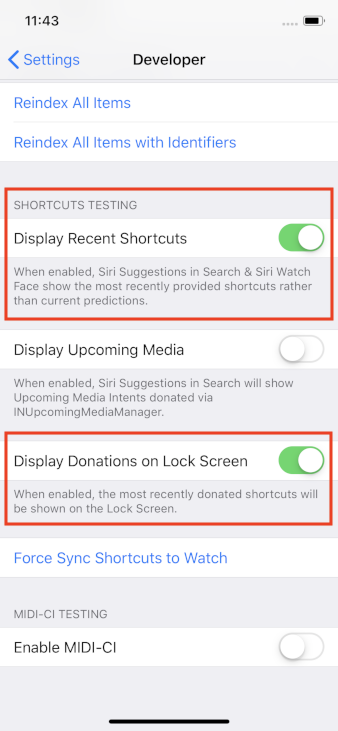
Intentions appear when the user does something systematically. However, when you want to test this functionality so that you always get a suggestion from Siri, you must enable two options — “Display Recent Shortcuts” and “Display Donations on Lock Screen” in Settings -> Developer.
- Create an intent definition file. The best way is to add it to a separate framework in my project it will be in
OrderKit.
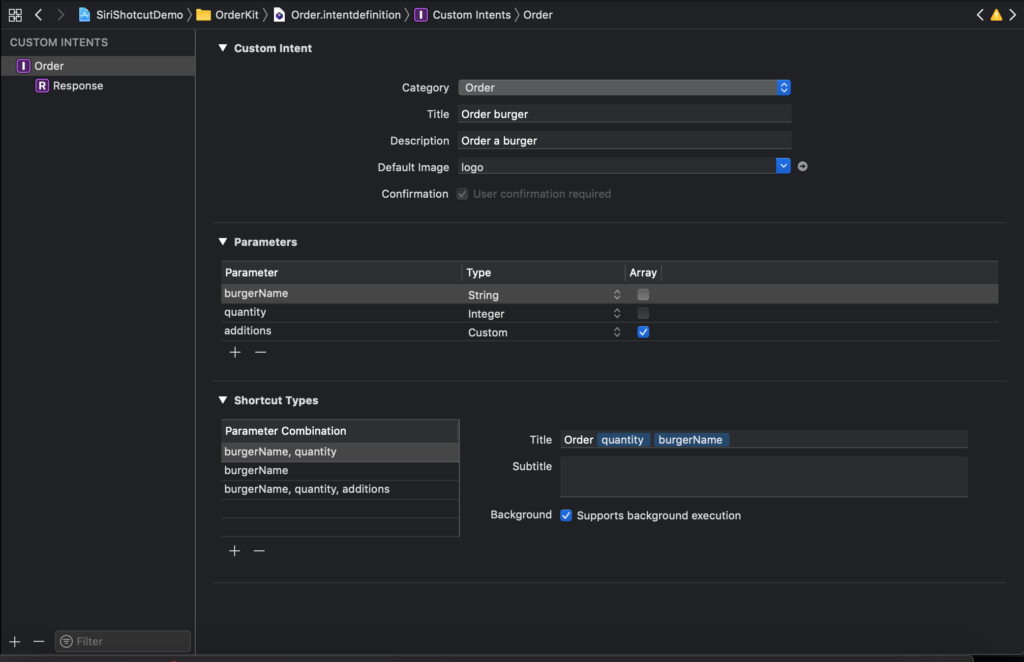
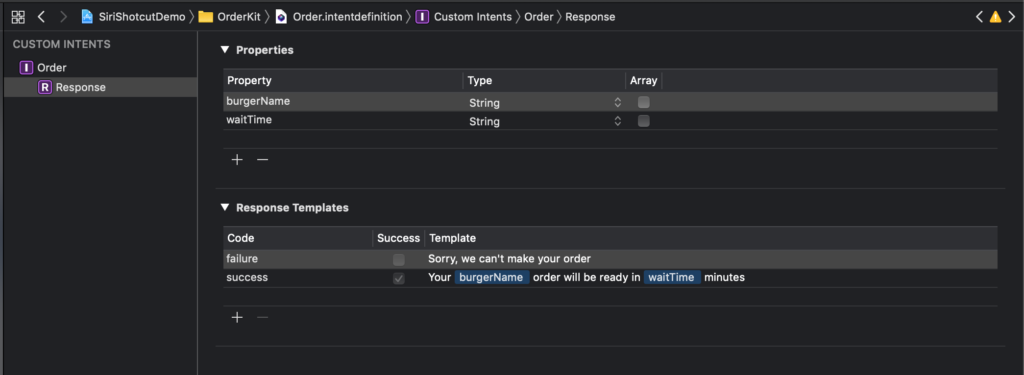
2. Select a category, in this case “Order”. In this file we have to choose the parameters that we will pass to the system and create combinations of these parameters.
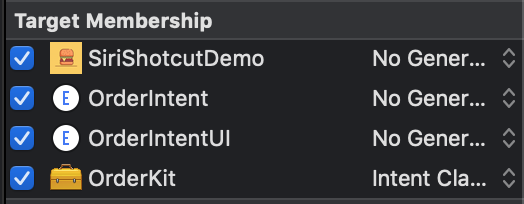
3. Create a new target with an extension for intentions, select “Include UI Extension” when you are creating it.

Order.intentdefinition4. Create a UI for intent in the MainInterface.storyboard file.
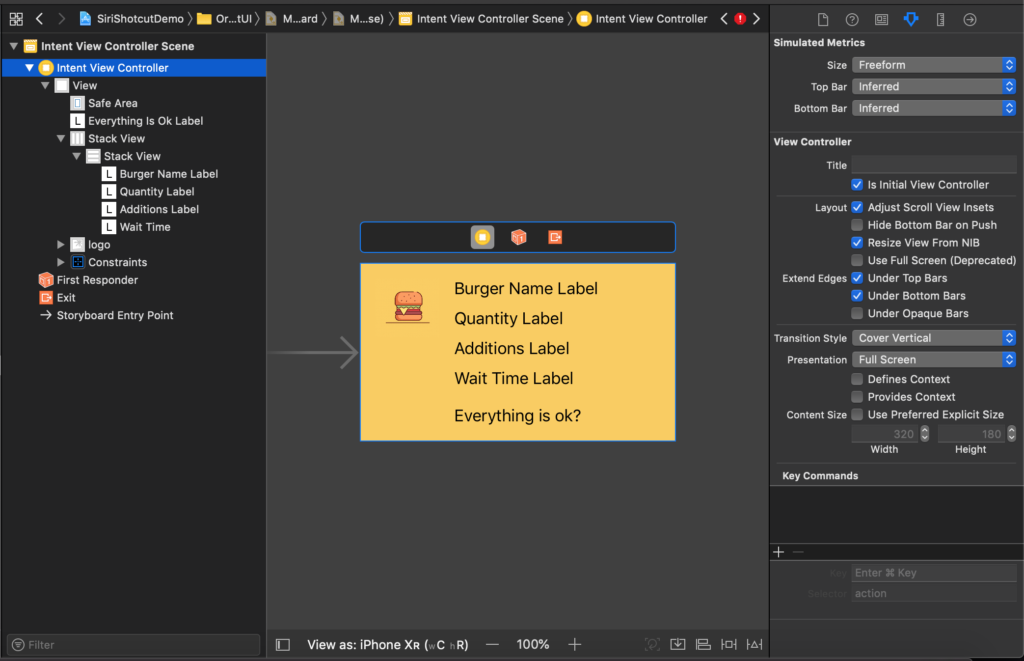
5. Configure ready and success state in inIntentViewController.
func configureView(for parameters: Set<INParameter>,
                       of interaction: INInteraction,
                       interactiveBehavior: INUIInteractiveBehavior,
                       context: INUIHostedViewContext,
                       completion: @escaping (Bool, Set<INParameter>, CGSize) -> Void) {

    guard let intent = interaction.intent as? OrderIntent else {
        completion(false, Set(), .zero)
        return
    }
    if interaction.intentHandlingStatus == .ready {
        setup(with: intent)
        waitTime.isHidden = true
        completion(true, parameters, desiredSize)
    } else if interaction.intentHandlingStatus == .success,
        let response = interaction.intentResponse as? OrderIntentResponse {
        setup(with: intent)
        waitTime.isHidden = false
        if let waitTimeText = response.waitTime {
            waitTime.text = "Order will be ready in \(waitTimeText) minutes"
        }
        everythingIsOkLabel.text = "Tap to show orders 😎 🍔"
        completion(true, parameters, desiredSize)
    }

    completion(false, parameters, .zero)
}

private func setup(with intent: OrderIntent) {
    burgerNameLabel.text = intent.burgerName
    if let quantity = intent.quantity?.stringValue {
        quantityLabel.text = "\(quantity) pcs."
    }
    if let additions = intent.additions {
        additionsLabel.text = additions.elements.toString
    }
}
6. After creating the UI, we can go to the donate of our intention. In this case, it is best to donate intentions when placing the order. We provide all the information to the system that we previously defined in the file Order.intentdefinition, i.e. burger name, quantity and additions, and the proposed phrase displayed in the case when we would like to immediately add this shortcut to Siri when placing the order.
private func donateInteraction(for order: Order) {
    let interaction = INInteraction(intent: order.intent, response: nil)

    interaction.donate { (error) in
        if error != nil {
            // handle error
        } else {
            print("Successfully donated interaction")
        }
    }
}
public extension Order {

    var intent: OrderIntent {
        let orderIntent = OrderIntent()
        orderIntent.burgerName = name
        if let intValue = Int(quantity) {
            orderIntent.quantity = NSNumber(value: intValue)
        }
        orderIntent.suggestedInvocationPhrase = "Burger time"

        orderIntent.additions = additions.map { option -> INObject in
            return INObject(identifier: option.rawValue,
                            display: option.rawValue)
        }
        return orderIntent
    }

}
7. Now we can handle the situation what is going to happen in the case when the user gets the suggestion of a shortcut and clicks on it and in case the user calls the shortcut by Siri.
public class OrderIntentHandler: NSObject, OrderIntentHandling {

    public func confirm(intent: OrderIntent,
                        completion: @escaping (OrderIntentResponse) -> Void) {
        completion(OrderIntentResponse(code: OrderIntentResponseCode.ready, userActivity: nil))
    }

    public func handle(intent: OrderIntent,
                       completion: @escaping (OrderIntentResponse) -> Void) {
        guard let burgerName = intent.burgerName else {
            completion(OrderIntentResponse(code: .failure, userActivity: nil))
            return
        }

        Defaults.save(order: Order(from: intent))
        completion(OrderIntentResponse.success(burgerName: burgerName, waitTime: "5"))
    }

}
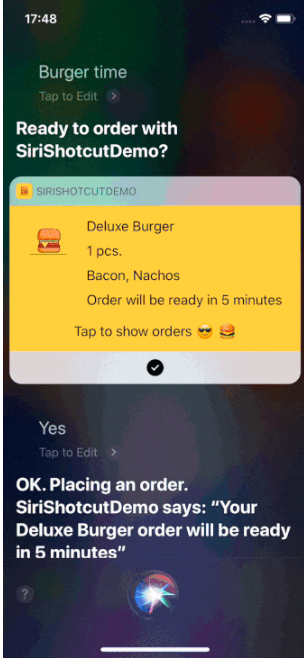
That’s all, everything works 🎉🎉🎉
You can check the whole project on my GitHub here.
If you are interested in other machine learning development services, contact us! We will help you implement the best possible solution needed for your project.
Sources:
- https://developer.apple.com/videos/play/wwdc2018/211/
- https://developer.apple.com/videos/play/wwdc2018/214/
- https://developer.apple.com/documentation/sirikit/donating_shortcuts
- https://developer.apple.com/design/human-interface-guidelines/sirikit/overview/siri-shortcuts/
- https://www.raywenderlich.com/6462-siri-shortcuts-tutorial-in-ios-12


