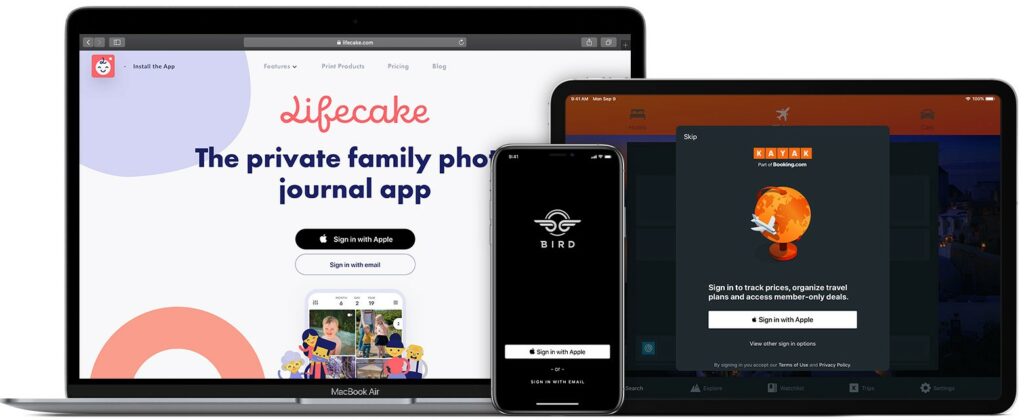
Sign In With Apple — a new feature presented by Apple at WWDC last year, is now available from iOS 13. This feature offers simple and secure account registration and login in the application or website. Instead of filling out registration forms or logging in via social media, you can now create an account and log in with your Apple ID and verify by Face ID, Touch ID or passcode.
👨💻 A short description of Sign In With Apple:
- Fast, easy account setup and sign in
- Verified email addresses
- Built-in security
- Anti-fraud
- Cross-platform 📱💻⌚️
- iOS 13+
In this article, I will focus on the basic implementation of Sign In With Apple on iOS devices without integration with the web version or integration with the back-end.
How does the “Sign In With Apple” feature work?
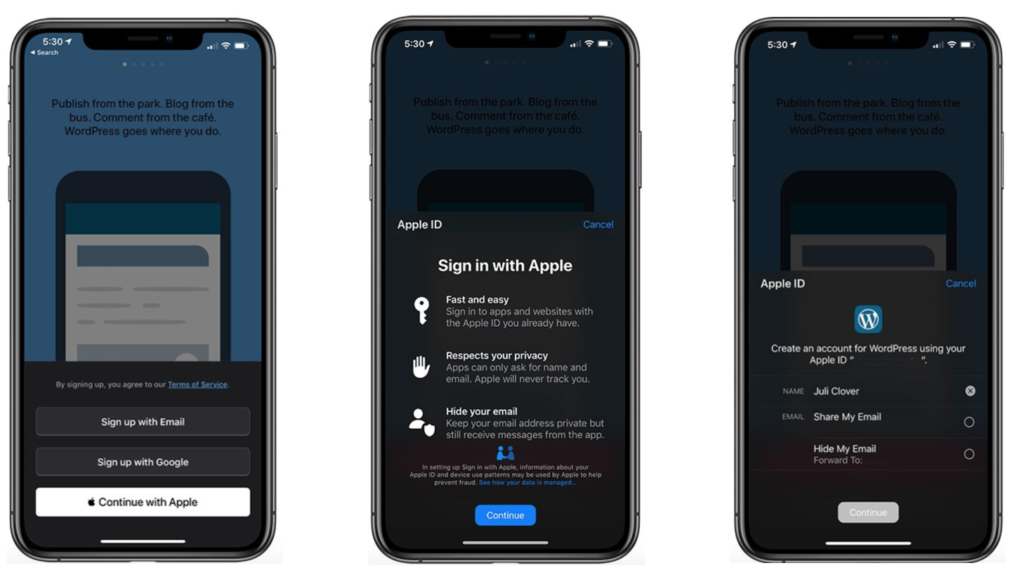
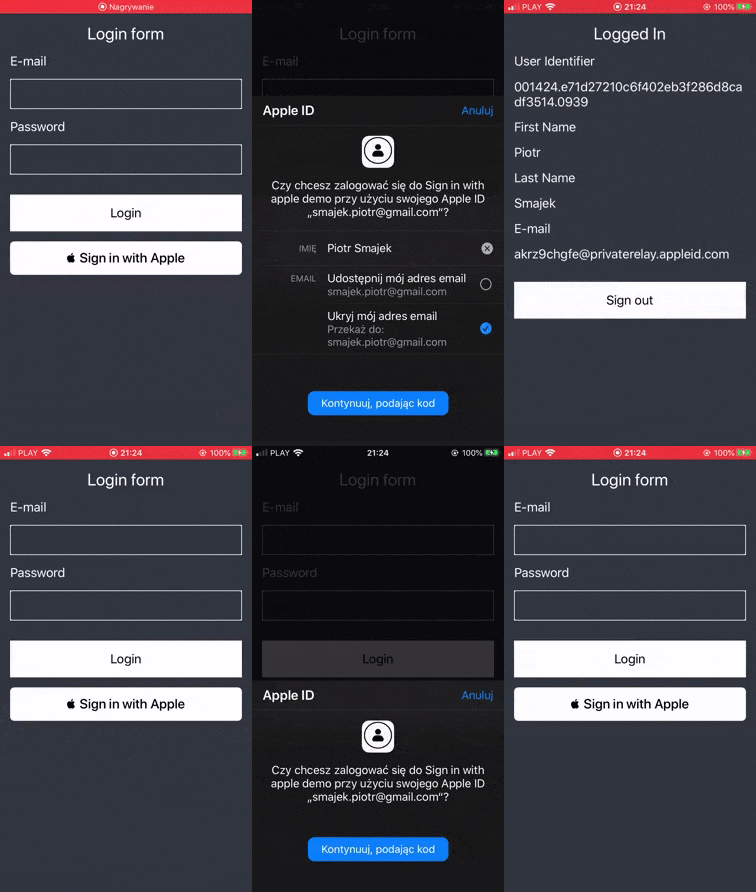
After tapping “Sign In With Apple” or “Continue with Apple” (it depends on which button was chosen to be implemented in the application) an information window appears with the possibilities of this solution (second screenshot). Then after tapping “Continue” we get information about what data will be shared with the owner of the application.
Here we have two options for registering an account in the application using Sign In With Apple:
- With sharing our email address — your real email address will be shared with the application or website.
- With hiding our email address — your real email will not be shared to the application or website. Apple will generate a unique email for you with the @privaterelay.appleid.com domain. Don’t worry, all emails from the owner of the app will be forwarded to your inbox anyway, because emails will be forwarded to our real email address. The owner of the app will only know the email address generated with the Apple domain
After selecting one of the options and tapping “Continue”, we verify our Apple ID as in the case of unlocking the phone, i.e. by Face ID, Touch ID or by entering the passcode. At this point, an account should be created in the application / website with a unique identifier for the user.
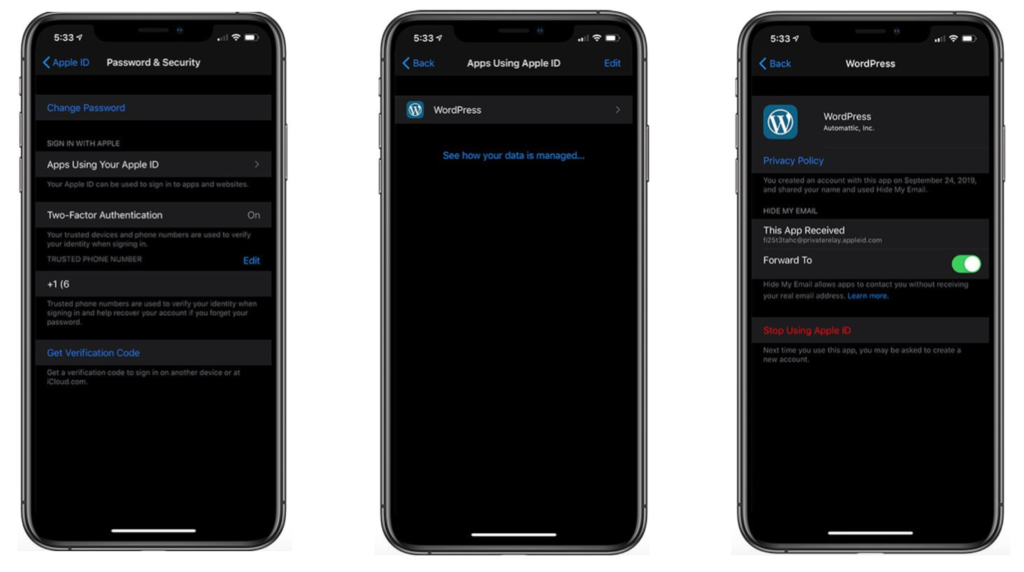
When you used in the application the “Sign In With Apple” before, then you can preview the details of this way of logging in settings and stop using this feature. To do this, go to Settings > Apple ID > Password & Security > Apps Using Your Apple ID > Choose App.
How to implement “Sign In With Apple”?
After reading the theoretical part of “Sign In With Apple”, we can proceed to the implementation 👨💻
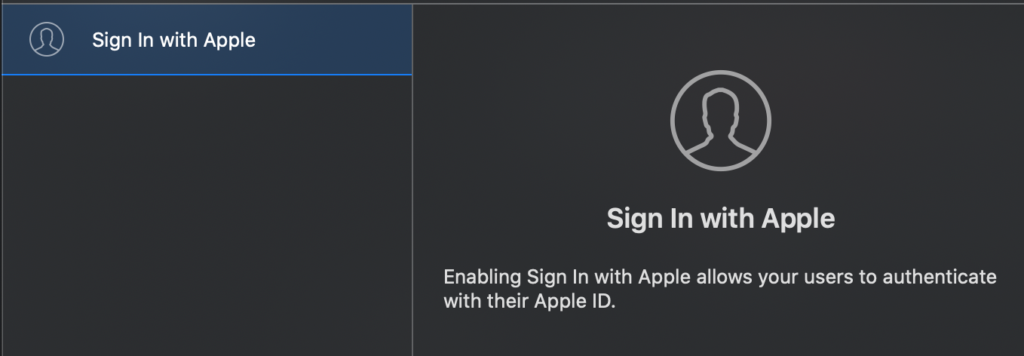
First of all, you need to open “Signing & Capabilities” in your project, then press + and add “Sign In With Apple” capability.

Apple at the WWDC keynote divide the process of implementing this feature into four stages. All stages are described below.
1. Button 📱
At the beginning, we have to add a button to our screen. This must be the ASAuthorizationAppleIDButton button from the AuthenticationService framework. It is available in two colours (white and black) with different titles. To the button, we must add an action that is to be invoked after tapping it. I describe the authorization action in the second point.
import AuthenticationServices

let button = ASAuthorizationAppleIDButton(type: .signIn, style: .white)
button.addTarget(self, action: #selector(appleIdButtonClicked), for: .touchUpInside)
stackView.addArrangedSubview(button)
2. Authorization ⚙️
Here we create an authorization request, in which as requestedScopes we provide only the information that is necessary to create an account in our application or website. In my case, this is the full name and email address. Then set the delegate and make the request.
@objc func appleIdButtonClicked() {
    let request = ASAuthorizationAppleIDProvider().createRequest()
    request.requestedScopes = [.fullName, .email]

    let controller = ASAuthorizationController(authorizationRequests: [request])
    controller.delegate = self
    controller.presentationContextProvider = self
    controller.performRequests()
}
3. Verification ✅
After a quick check by Face ID, Touch ID or passcode, the authorization result will be returned. When the authorization is successful, the didCompleteWithAuthorization method will return an object of AppleIdCredential type. Then you need to check if they are credentials of the ASAuthorizationAppleIdCredential type — if yes, in this object we will find all the necessary data to set up an account in our system, such as the unique user ID, full name and email address (which the user had asked for earlier). At this point, we can proceed to create an account in our system by providing only the necessary information. If an error occurs, it will be returned in the didCompleteWithError method, where we can handle this error.
func authorizationController(controller: ASAuthorizationController, didCompleteWithAuthorization authorization: ASAuthorization) {
    if let appleIDCredential = authorization.credential as? ASAuthorizationAppleIDCredential {
        // Create an account in your system.
    } else if let passwordCredential = authorization.credential as? ASPasswordCredential {
        // Sign in using an existing iCloud Keychain credential.
    }
}

func authorizationController(controller: ASAuthorizationController, didCompleteWithError error: Error) {
    print(error)
}
4. Handling changes 🔀
You must be prepared for the fact that the user, for example, has stopped using the application login using an Apple ID. This should be handled properly after the user relaunches the application.
Using the user ID we received during account registration, we can get the current state of the Apple ID credential by invoking the getCredentialState method very quickly. This method can return three states:
authorized— an authorized user who can continue using the application.revoked— log out the user and you can optionally lead him to the login screen to log in again.notFound— means that the user has not previously used “Sign In With Apple”. At this point, also show the user the login screen.
The getCredentialState method invoke should be in AppDelegate in the didFinishLaunchingWithOptions method.
Additionally, Apple provides Notification, in which it informs when credentials have been revoked and then we have to handle it in the above-mentioned way for this status.
appleIDProvider.getCredentialState(forUserID: userId) { credentialState, error in
    switch credentialState {
    case .authorized:
        // The Apple ID credential is valid.
    case .revoked:
        // The Apple ID credential is revoked, log out.
    case .notFound:
        // No credential was found, so show the sign-in UI.
    default:
        break
    }
}

// Register for revocation notification
NotificationCenter.default.addObserver(forName: NSNotification.Name.ASAuthorizationAppleIDProviderCredentialRevoked,
                                       object: nil,
                                       queue: nil) { _ in
    // Sign the user out, optionally guide them to sign in again
}
After implementing all four stages in my sample application, everything works 🎉🎉🎉 and it looks like this:
Do I have to add “Sign In With Apple” to my app? 🤔
If your application uses a third-party login method such as Facebook, Google or LinkedIn, then you must also add Sign In With Apple according to new guidelines. If you don’t add it, your application may be rejected and may not be reviewed by Apple. Below is a link to the news and a quote from the guidelines.
New Guidelines for Sign In With Apple— September 12, 2019 ⚠️
Starting today, new apps submitted to the App Store must follow these guidelines. Existing apps and app updates must follow them by April 2020.
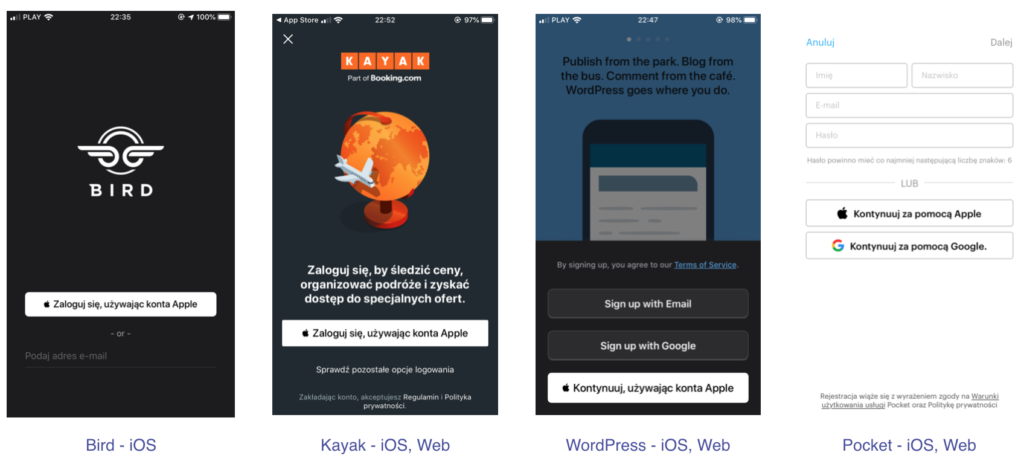
Below are applications that offer logging in using new Apple’s feature, of course, there are more and more of them every day 😎
👨💻 You can check the whole project on my GitHub here.
📚Sources:
